It doesn't take a SQL expert to join tables using Sage Intelligence. The Graphical Join Tool in the Connector makes it fairly simple.
Oftentimes the data that we need for our reports comes from joining two or more different tables. The following process allows you to quickly join tables without having to know SQL, by just clicking and dragging a connection between the fields within a group of tables.
Before you use the Graphical Join Tool, it is best to have all your data requirements and know the tables and fields you are going to use. Here is the process:
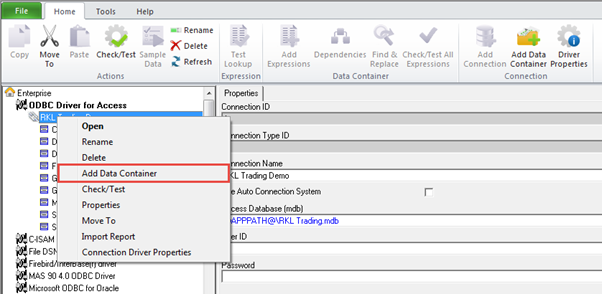
- While in the Connector module, find the connection that you want to make your container under. This is specific to your ERP or the data source you are going to be connecting to.
- Right-click on the connection and select Add Data Container from the menu that comes up.
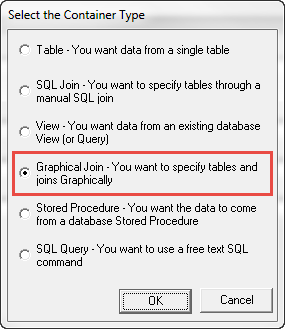
- Select Graphical Join from the Container Type menu. Then select
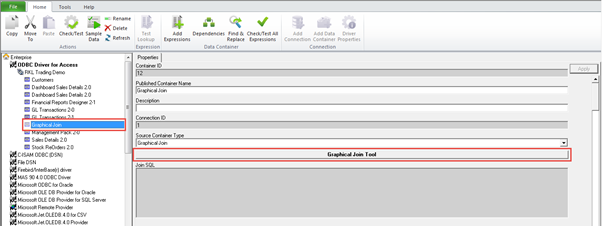
- A window will pop up that requires you to provide the container a name. Make sure to be descriptive so that you know its contents. The name should also be related to the report you want to use it for. Your container will then be added to the list of containers under the connection in the Object window.
- Next, select your new container and click on the Graphical Join Tool button in the container’s Properties window.
- A new window will appear listing all the tables available in your Sage ERP, accounting package or other data source. Select the tables you need and click OK. Each of the tables selected will be shown graphically as a list of the table’s fields.
- Find the fields that are common between two tables and click and drag the field from the first table onto its related field in the second table. A join will be created between the two tables represented by a colored line with a handle on either side.
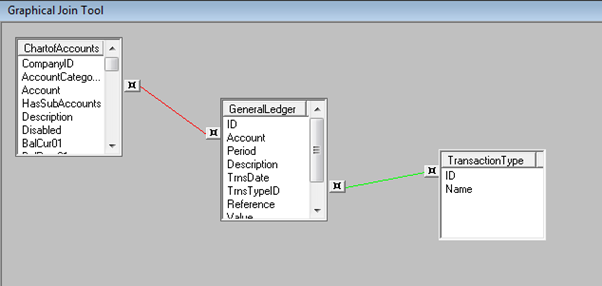
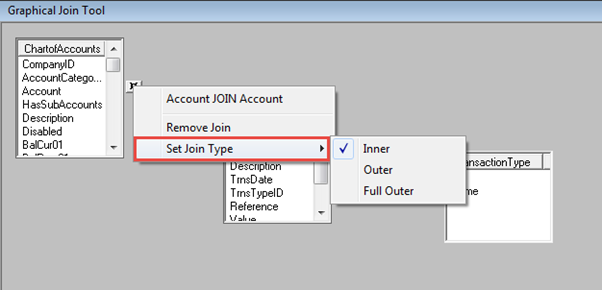
- If needed, you can change the join type of a join by right-clicking on either of the join’s handles and selecting Set Join Type.
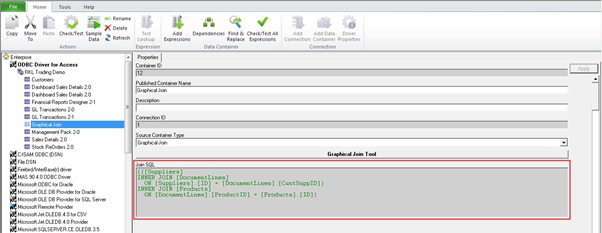
- Choose Apply near the bottom right of the screen and then save your changes. You'll see the SQL syntax for your join in the Join SQL field of the container’s properties.
It is recommend that you test your container after you have created your new join. You can do this by right-clicking on the container and choosing Check/Test from the context menu. If your graphical join is correct, you will receive an alert stating that your check succeeded. If not, you need to check your join, container and connection for any errors. You are now able to add expressions to your container.
If you need to add more tables to your join you can do this by selecting the Graphical Join Tool button again, and then selecting the Add Table button and repeating the process described above.
For answers to your questions, or more help with Sage Intelligence contact Equation Technologies today. We are a certified Sage partner and specialize in Sage 300 ERP.
