Everyone makes mistakes, and it is during the fixing of our mistakes where we often learn the most. Also – it’s not just about mistakes, sometimes we just need to make changes due to additional information or for many other reasons. The most logical place to make adjustments is in the AR and AP Adjustment Batches.
When adjusting entries for AP, you must enter a document number to be adjusted. It is not possible to enter an adjustment on its own, and not have it applied to a previously posted document. Once the document is entered, we now have the ability to select a specific line from that document to adjust. The benefit of selecting a line, is that we have the GL account or distribution code already populated for us, and all that needs to be entered is the amount.
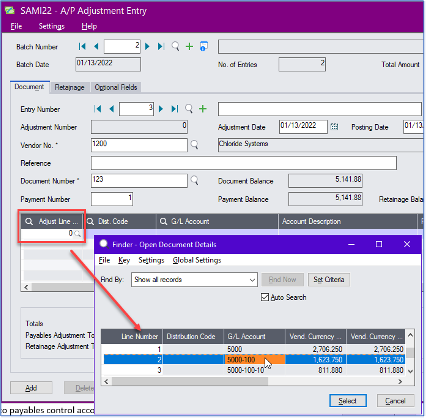
However, if you want to adjust the invoice to a different account than the original, selecting a line is not mandatory. You can leave the line field blank, and just enter the desired distribution code or GL account to which the adjustment should be posted.
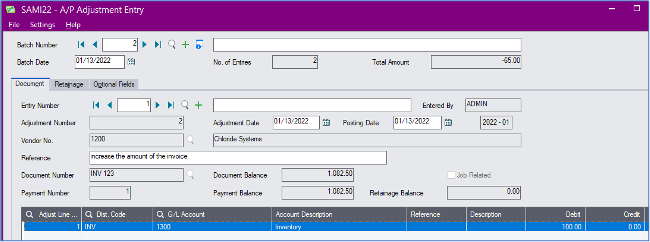
It can also be a little confusing if you should debit or credit the adjustment. There’s nothing worse, than doing it backwards and having to do another doubled up adjustment to fix it! Here’s the cheat sheet on debits and credits for AP Adjustments:
Debit – increases invoice amount
Debit to account specified, credit to payables control account
Credit – decreases invoice amount
Credit to account specified, debit to payables control account
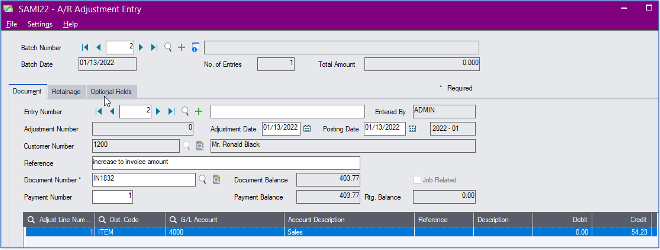
Adjusting entries for AR is very similar to adjusting entries for AP, except the result of the debits and credits are reversed:
Debit – decreases invoice amount
Debit to account specified, credit to receivables control account
Credit – increases invoice amount
Credit to account specified, debit to receivables control account
Another key function of AR (or AP) adjustments, is to be able to reclassify the original entry. This is essentially a zero adjustment, where there is no net change to the balance of the document, but you can credit one GL account and debit another GL account to make a correction, or re-classify the original posting.
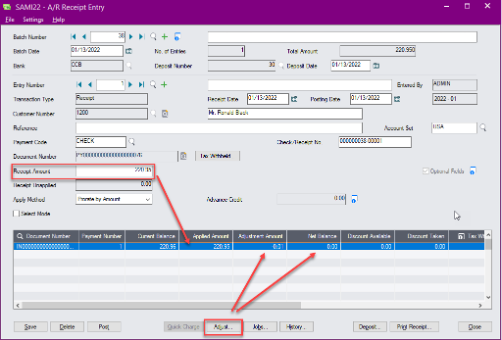
AR also has the ability to make adjustments directly within a receipt entry. This is a function that needs to be turned on in AR Setup, on the Transactions page.
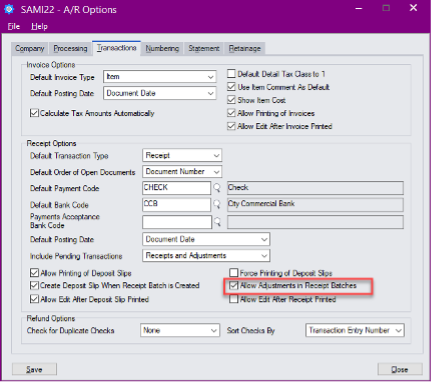
Sometimes a customer payment may not be for the exact amount of an invoice. It may be out a few pennies, due to rounding, or perhaps there was an issue with the goods, and the invoice is being short-paid. By using the Adjust button on the bottom of the receipt entry screen, we can adjust the balance of the invoice during the receipt entry. This button brings up the adjustment entry screen as if we were in the Adjustment Batch. When we close the adjustment entry screen, we are able to see the balance of the document immediately during the entry, so we can be assured we are posting the adjustment to the correct debit or credit!
These are only 2 of the many ways that adjustments and corrections can be done in Sage 300. Review our training video recording on adjusting entries in Sage 300, for more great adjustment methods in all of the different modules!