
Sage 300 offers an abundance of different options for importing into the system. Today, we’re specifically highlighting the Sage 300 Import Feature (along with Sage 300 import templates), which allows you to import both setup records and transactional records from GL Accounts, Customers, and Vendors to Journal Entries, Invoices, Receipts, Refunds and so much more. This can save a lot of time for accounting teams and decrease manual errors, which can have a huge impact. For example, if you have a GL Journal Entry with a lot of details it can often be much more efficient to copy/paste details into a GL JE import template than to rekey each and every entry.
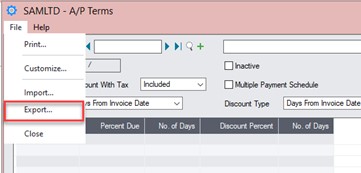
For our importing example today, we’ll be using the AP Payment Terms screen (Accounts Payable > A/P Setup > Terms). Thankfully, the concept of importing/exporting is very similar across all modules and screens within Sage 300. This makes it easy to learn it in one area and use wherever you would get the most impact.
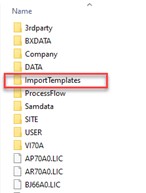
To gather an Import Template you can use the Sage 300 Import Templates provided by Sage Software, which are typically found within your “Shared Directory”, as seen here:
For our example, to add an extra layer of complexity in case you are in the same situation, the import file is not available within the Sage 300 Import Templates Folder. Don’t worry, to create that template file, we simply need to do an export from the screen that you want to import into. So, first navigate to that screen, then select “File > Export…”:
For Type we will choose Excel 2007. Then we will select “Browse” to save the file to our desktop. Then select Ok to begin the Export. Don’t worry, there are several other Types available if you prefer a different one: Excel 2000, Excel 2007 Binary Workbook, Single CSV File, CSV File, Access 2007, ODBC, and XML.

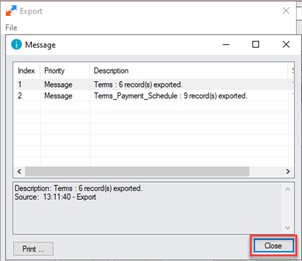
The system will then generate the export file and we will see how many records were exported. Select Close.
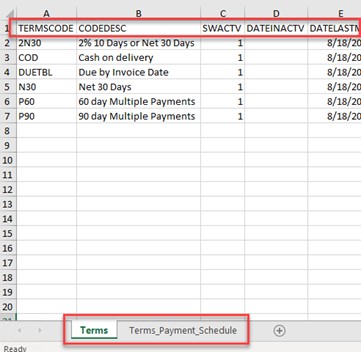
Now, navigate to the file you just exported. This will be our Import Template.
Before going further, there are a few things to remember in order to have a successful import:
For today, we’ll be adding a new Terms code ‘N45’ For Net 45 Days. We’ve populated the fields as necessary, but for a full list of table/field names, please see the Sage 300 202X.X Application Object Model.

Now we have populated our file with a new record to import, let’s navigate back to the AP Payment Terms screen (Accounts Payable > A/P Setup > Terms). Select File > Import…

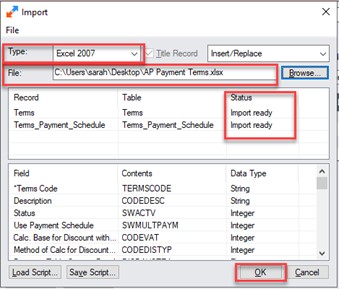
Make sure the Type is set to Excel 2007, since that is the file type we originally exported. Use the “Browse” to locate the file and populate the File Path, and make sure the Status shows as Import Ready, then select OK to import.
A couple areas to note about the screen above:
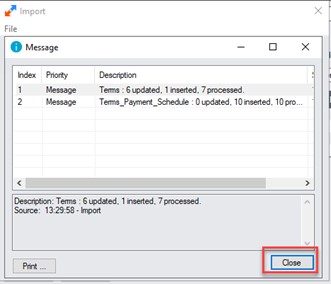
Just as when we Exported our file originally, we’ll get a message after our Import to indicate how many records were imported and processed. Select Close.
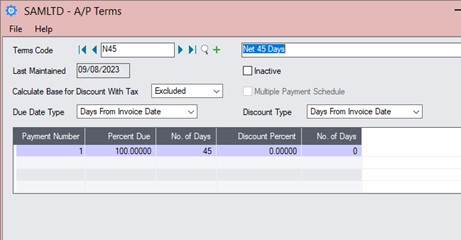
Now we can go and look at the new “N45 – Net 45 Days” record we just imported.
This is just an example of a Setup Record Import, but there are a many screens/functions in Sage 300 that allow you to import data in order to improve efficiency entering data into the system, particularly as the number of records to be added grows or the entry becomes repetitious.
If you have any questions about creating Sage 300 import templates or importing into Sage 300; have more questions about Sage 300 itself; or have questions about your business technology, please reach out to our team of experts.