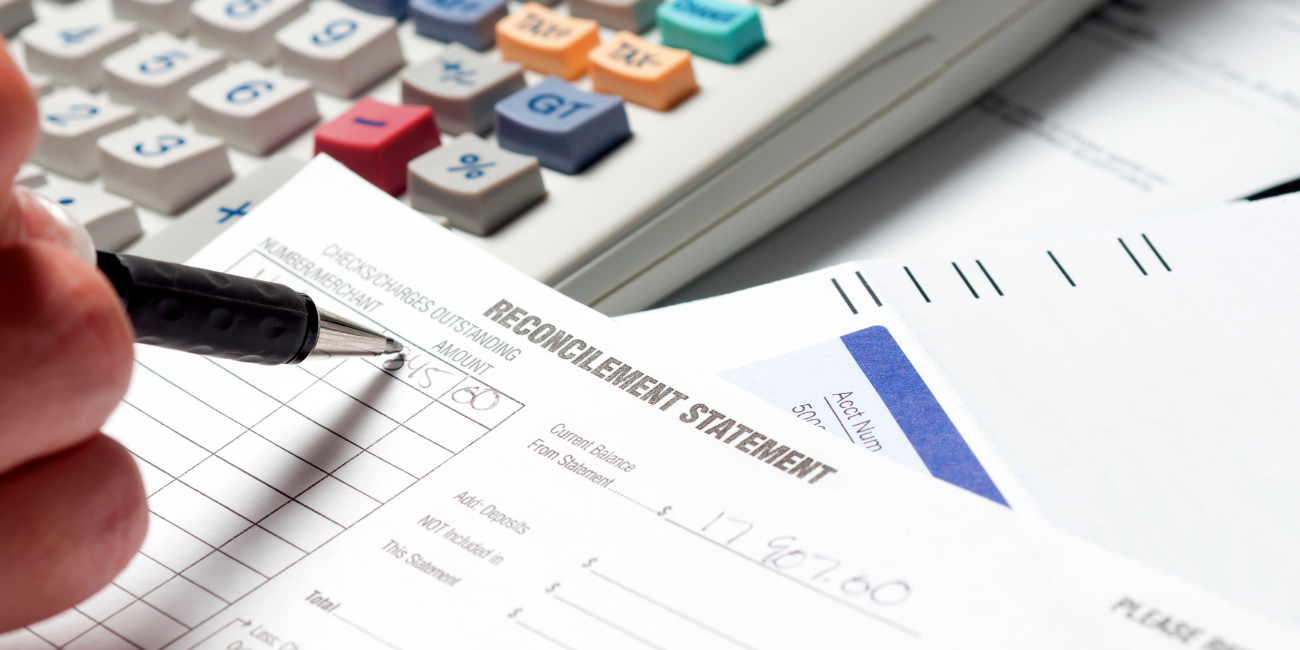
Time is a valuable commodity, and who couldn’t use a little more of it in our day? Importing the bank statement into Sage300 and using the Reconcile OFX Statements function can reduce the amount of time required to reconcile the bank account. This functionality automatically matches and clears withdrawals and deposits and allows creation of a bank entry from an unmatched transaction.
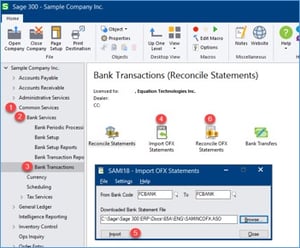
The first step is to import the bank statement. If your bank provides your statement in an OFX format (normally with file extensions .ofx, or .aso), downloadyour statement and then go to Bank Transactions / Import OFX Statements to do the import. Once the statement has been successfully imported, open the Reconcile OFX Statements screen.
** If your bank does NOT provide your statement in an OFX format, we have a utility we call SmartOFX that will convert an Excel or CSV file into OFX and import it directly into Sage – allowing you to skip the first 5 steps above! **
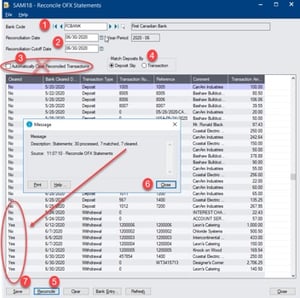 Enter the bank code for the imported bank statement. The transactions shown here are the ones that have been imported from the bank statement. Enter the Reconciliation and Reconciliation Cutoff Dates, and make sure that the option to ‘Automatically Clear Reconciled Transactions’ is turned off. This is recommended so that you are able to see the cleared transactions in the other bank rec screen and/or make adjustments if necessary. Match Deposits by Deposit Slip and then click on 'Reconcile' to have the system automatically match these bank transactions to those posted in Sage. Then Match Deposits by Transaction and reconcile again. Once the transactions have been matched, (those that can be), save the reconciliation.
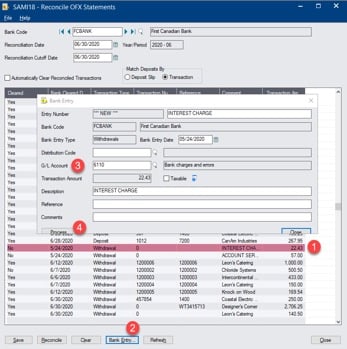
Highlight unmatched lines and click on 'bank entry' to create a bank entry that will match to that transaction. Enter the distribution code or the GL account for the entry and click on Process.
The bank entry will be posted and the transaction cleared in the Reconcile OFX Statements screen.
Then close the Reconcile OFX Statements screen and open the Bank Reconciliation screen. All the entries that were cleared through the Reconcile OFX Statements are cleared here! The only thing left to do is to enter the statement balance, confirm the out of balance amount is zero, and post the reconciliation! Just think of what you can do with all that time that you have saved!
Test drive the OFX bank import and reconciliation first, before trying it on your live bank account. You can use Sample Company Inc. or Sample Company Ltd. with an OFX file that Sage has provided just for this purpose. Look in your program files directory in the Docs\65A\ENG folder. Here you will find SAMINCOFX.ASO and SAMLTDOFX.ASO files which can be imported using the OFX Import function and check out the OFX Bank Reconciliation for yourself!
See Also: Sage 300 Tutorials and Demos
If you would like access to the SmartOFX utility, contact us. We are here to help!