Normally, one would expect that product updates would program fixes and general improvements to existing features. However, the latest two product updates for Sage 300 version 2020 have released some awesome new features!
We have waited a long time for this one! In older versions, only the sub-ledgers were able to use the Tax Codes and Tax Groups from Tax Services. If an entry needed to be done in the GL, the tax needed to be assigned to the specific tax GL account and then it would not be included in the Tax Tracking report. Now, in version 2020 PU2, the GL and Tax Services have finally been integrated!
In the Journal Entry screen, there is an Entry Type field, which allows you to choose the Standard entry, or an entry with Sales Tax or Purchases Tax:
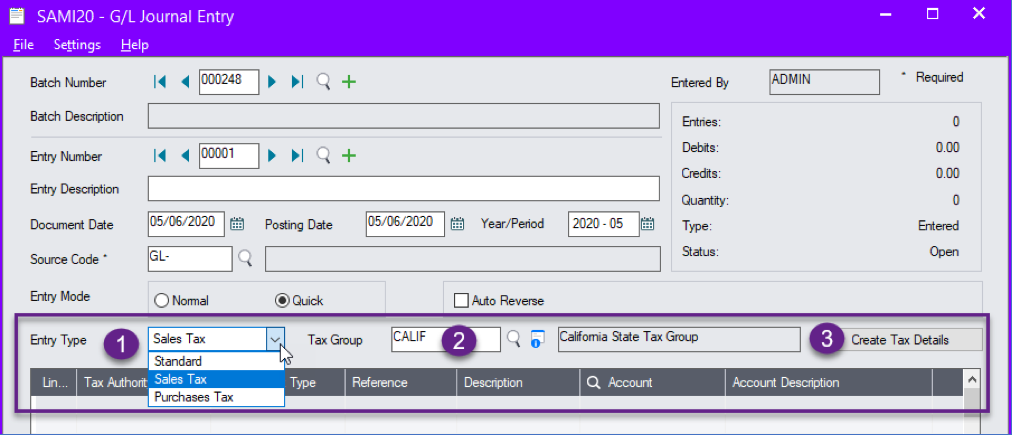
When Sales Tax or Purchases Tax is selected, the Tax Group field becomes available. Select a tax group and then click on Create Tax Details:
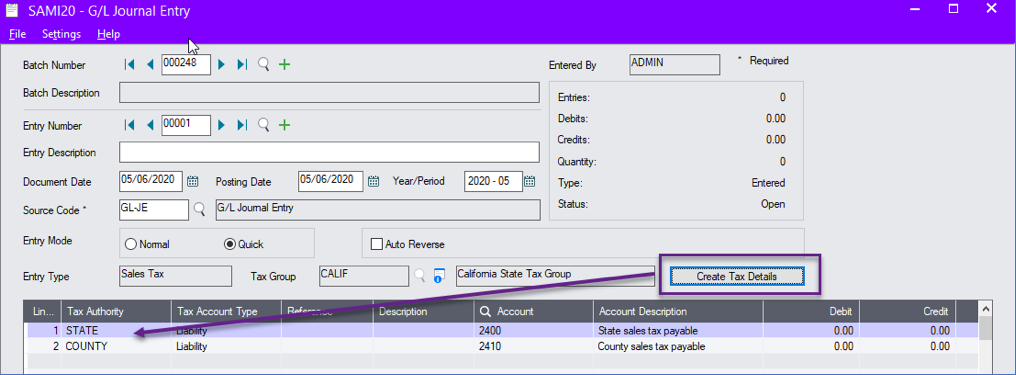
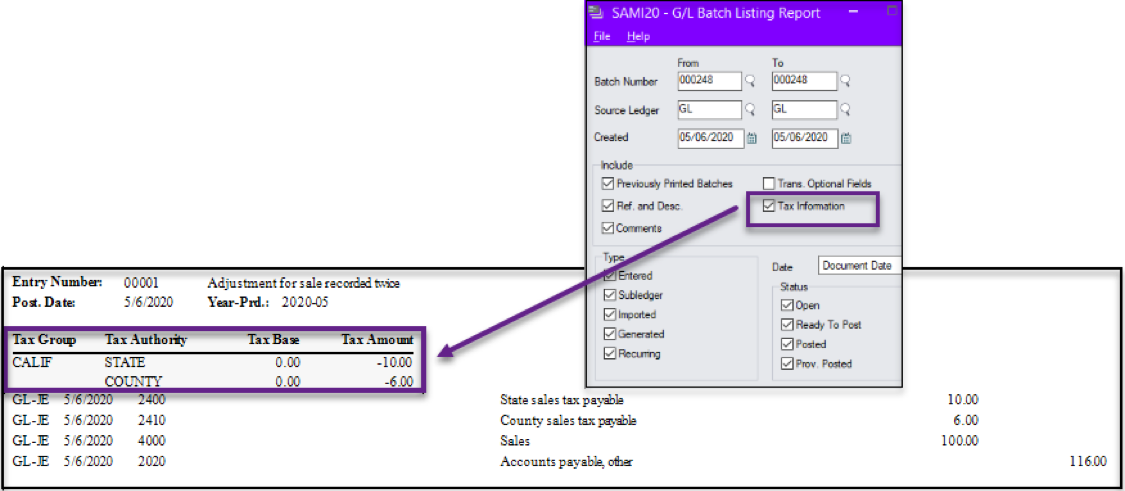
The tax authorities belonging to the tax group are then populated in the detail grid along with their respective GL account numbers. All you need to do is enter the amounts and insert any other lines for that journal entry. You can see the tax information on both the Batch Listing report and the Posting Journal report by selecting the option to include the Tax Information on the report.
The ability to import bank statements and auto reconcile the bank account with the imported statement has been a feature in Sage 300 for a very long time. In version 2020 PU2, the Reconcile OFX Statements function has been renamed Reconcile E-Statements. The ‘old’ feature of reconciling with an imported bank statement has not changed. What HAS changed is the new ability to connect with a bank feed, download transactions from your bank and automatically match those transactions to your Sage bank. (Note: this feature is available in the subscription version of Sage 300 only, not perpetual, but can be used in either the Sage 300 cloud web screens or from the Sage 300 desktop).
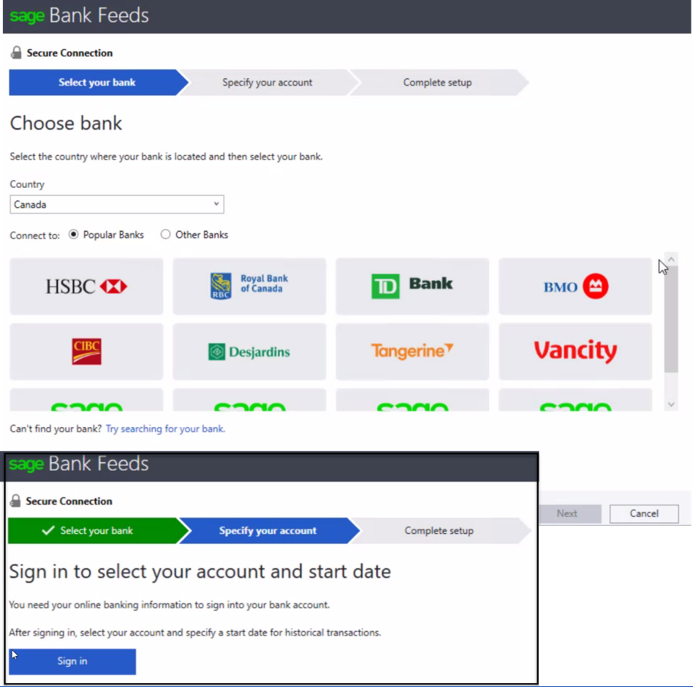
Go to Common Services / Bank Services / Bank Transactions and open the Reconcile E-Statements screen. Enter your bank code and go to the right side of the screen to setup the initial connection to the bank feed.

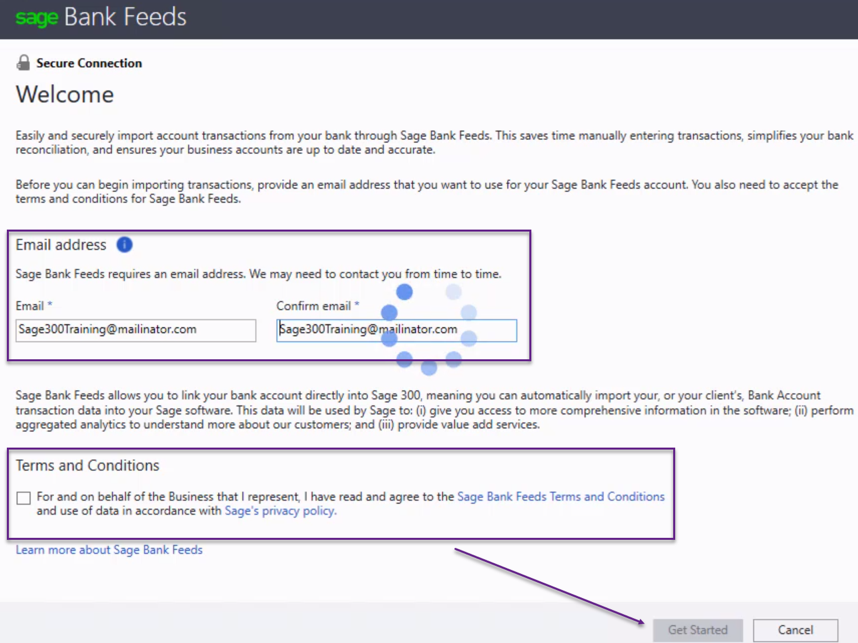
The first time you setup bank feeds you will need to enter an email address (which will be the same for all banks) that can be used to contact you about your bank activation or de-activation. Agree to the terms and conditions and click Get Started.

Select your bank and sign in.
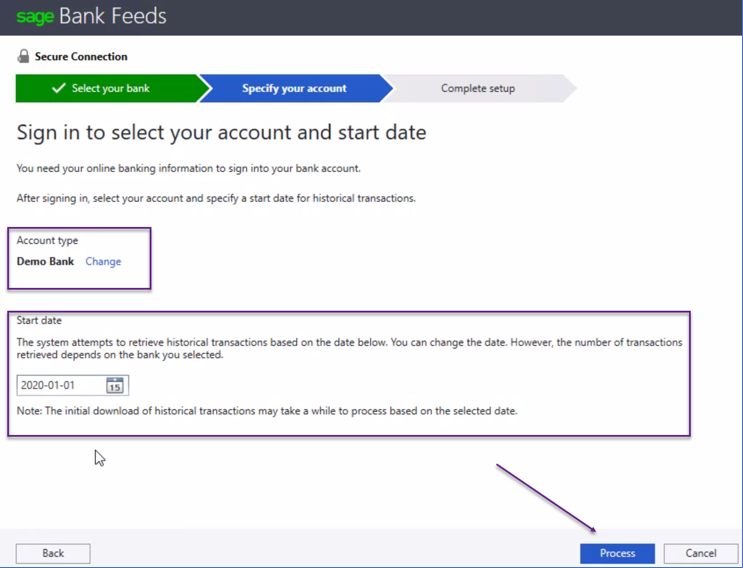
Choose your account, the start date of the transactions that you want to see, and Process and you are good to go!
From this point, the auto-matching feature and reconciliation steps are the same as for reconciling using an imported OFX Statement: Download transactions, Match transactions, enter bank transactions, manually clear or write off unmatched transactions. Ensure the reconciliation is balanced and Post. Note that after the first time connecting to the bank feed, you will only need to click on ‘Get Transactions’ from the Reconcile E-Statements screen to download your bank feed.
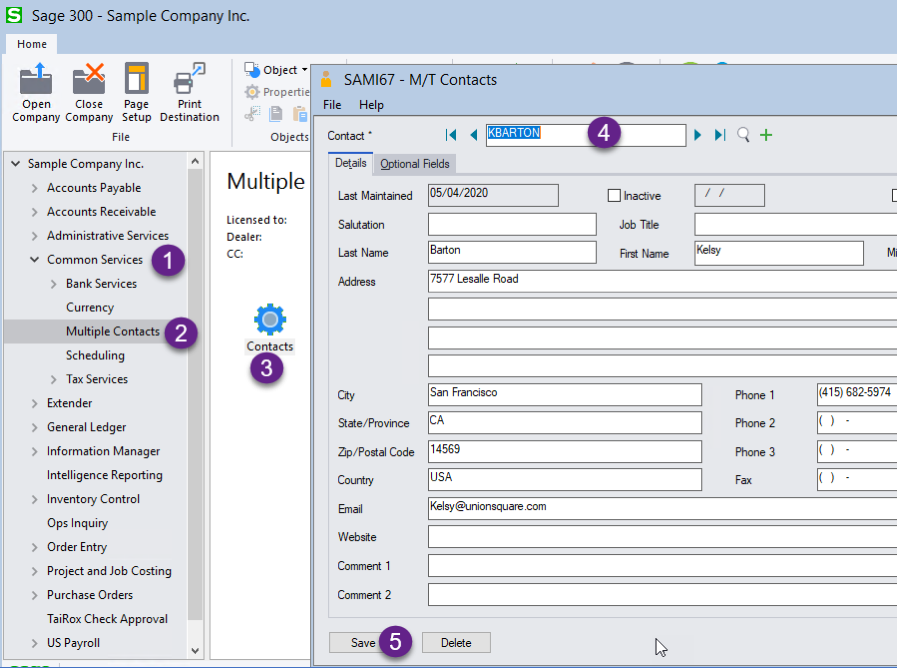
This is a great new feature brought in with PU1 for version 2020. No longer do we need to cram two email addresses in the AR Contact Email field, or re-purpose a different field for other email addresses. Both AR Customers and AP Vendors can now have multiple contacts listed, and each contact can be assigned to receive a specific document or set of documents.
After activation, the Multiple Contacts module is located under Common Services. All contacts can be setup and managed from here.
Once the contacts have been added in Multiple Contacts, they can be assigned in the Customer or Vendor record on the Contact tab.
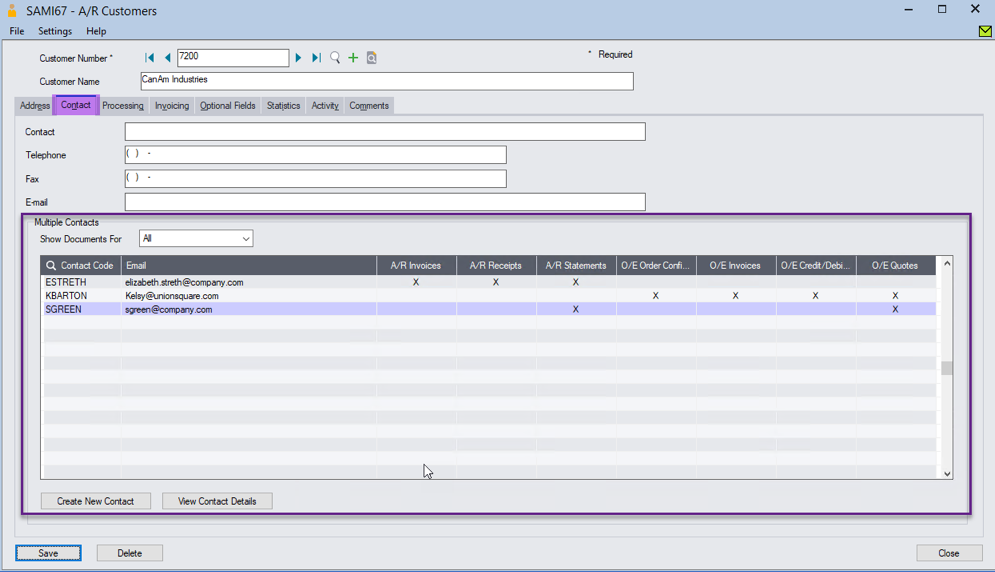
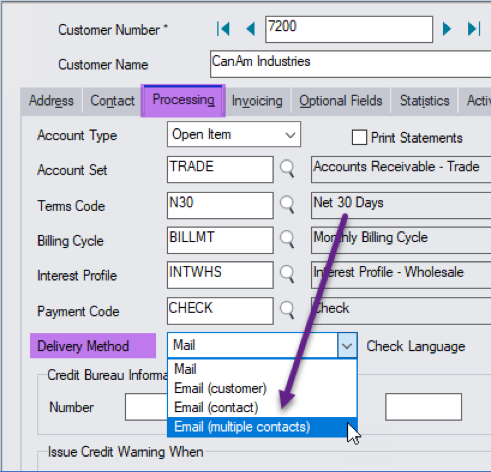
You can assign each contact to receive different documents and you can create a new contact from this screen as well, by clicking on the Create New Contact button. If you highlight a specific contact and click on the View Contact Details button, you can edit the contact and save any changes. From the Processing tab, select the Delivery Method to be Email (multiple contacts) to have the settings for Multiple Contacts be effective.
If you want more information on these great features, give us a call or an email. We would love to talk with you.