
Firstly, you must have at least Sage 300 version 2020 PU2 in order to have access to the Bank Feeds feature. The next steps are:
Sound simple? It is!
In ‘How to Use Bank Feeds in Sage 300 – Part 1’ we covered step 1 – connecting your bank account to its corresponding Sage 300 bank. If you missed that one, let us know and we can forward it to you. Now we are going to go through steps 2 – 6 and outline some tips for reconciling using bank feeds and the Reconcile E-Statements function.
Download transactions from your bank into the Sage 300 bank
After you have successfully connected to your bank feed, you will be returned to your Reconcile E-Statements screen. You only need to connect to your bank feed once, and then every time the Reconcile E-Statements screen is opened, you will still be connected to your bank. Click on the Get Transactions button to download the bank transactions.
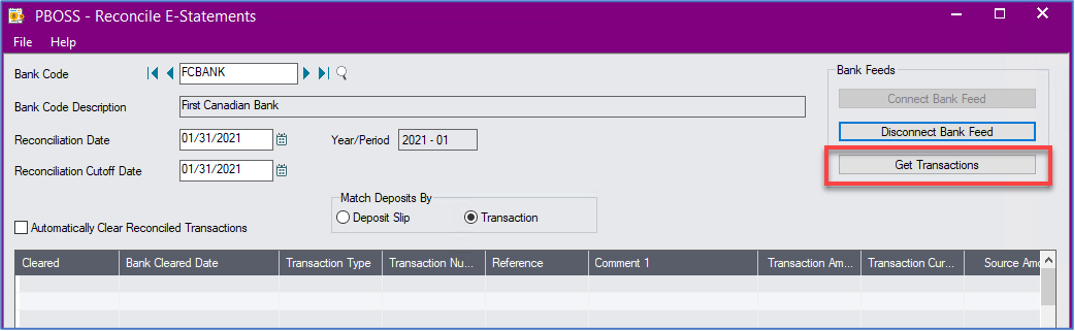
Note that transactions will be downloaded right up to the current date, but only those up to the Reconciliation Cutoff Date will be displayed on the screen.
Auto-reconcile matching transactions between Sage entries and those clearing the bank account
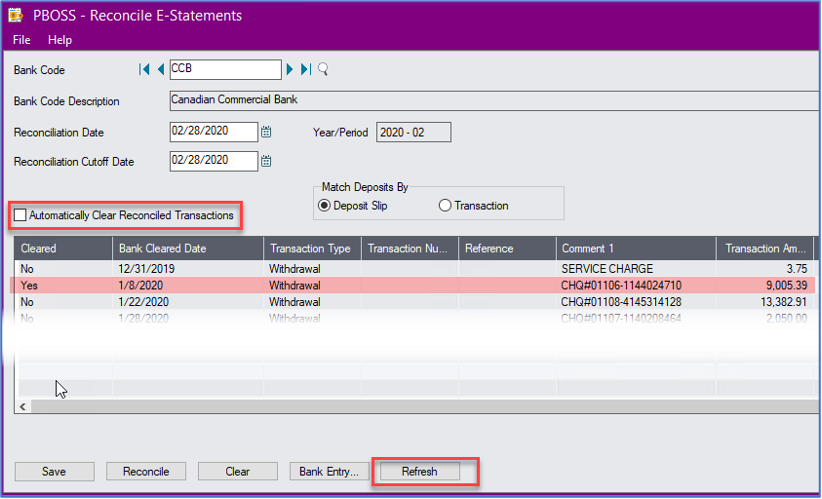
The next step is to set the criteria for Matching Deposits and the Automatically Clear Reconciled Transactions option. Click on Reconcile, and the program will go through the Sage transactions and match them to the transactions that have been cleared through the bank.
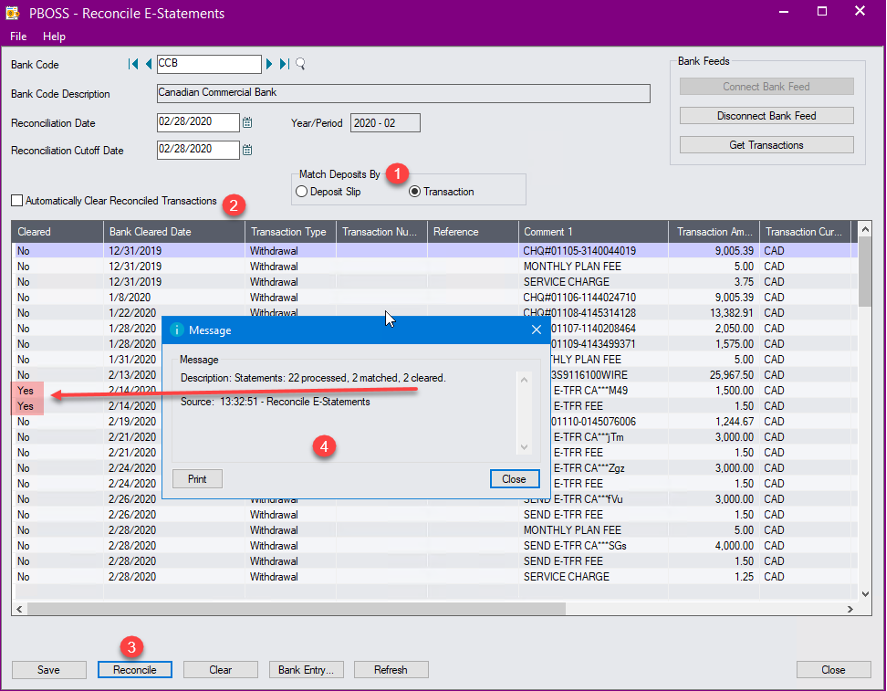
A summary screen will be displayed listing the results of the Reconcile function. You can see in the background, because we have not automatically cleared reconciled transactions, which ones have been cleared.
The criteria for matching payments or checks clearing the bank are as follows:
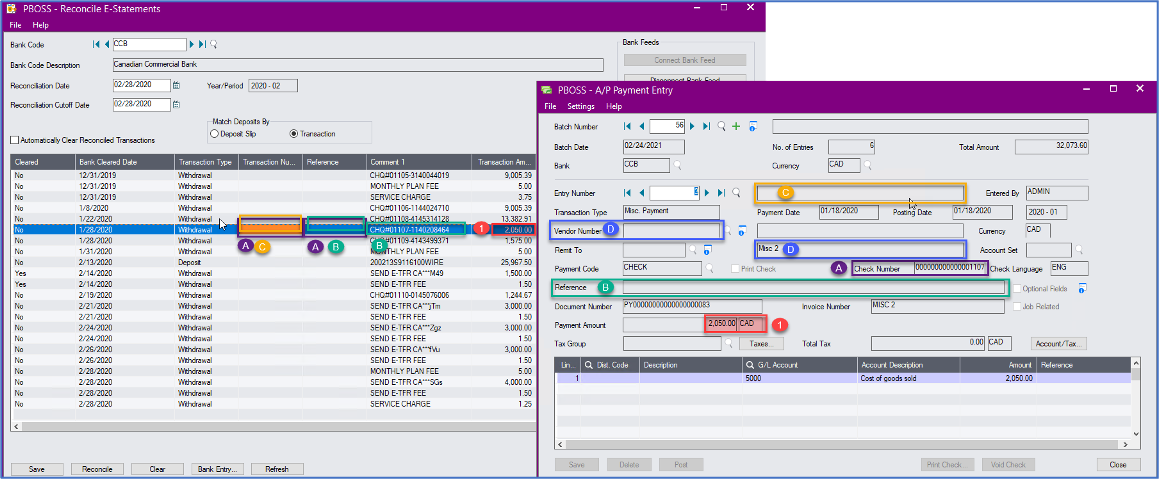
The illustration below shows how a check entry would be matched to a bank entry. In this example, even though the amount of $2,050.00 matches, none of the other criteria match, and so the entry cannot be automatically cleared by the reconciliation process.
Because the bank formats are unlikely to change, we may need to amend how we enter the payment transactions to include the relevant information in the appropriate fields to allow the Reconcile to clear as many transactions as possible.
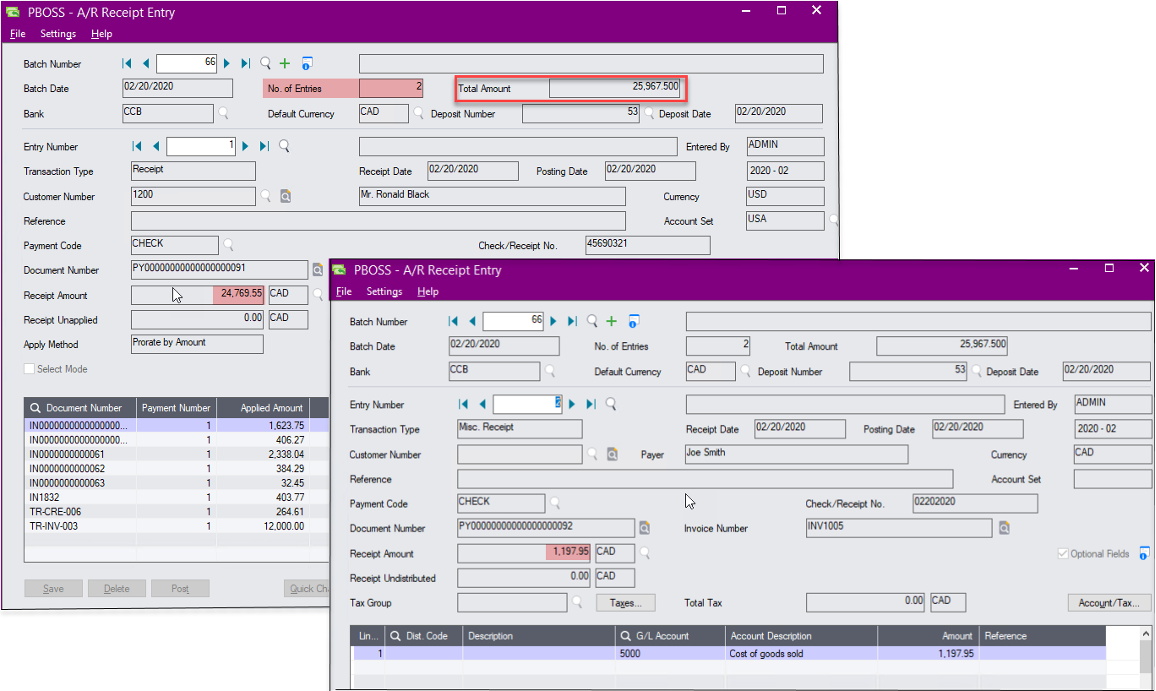
The criteria for matching deposits clearing the bank, using the Transaction method, are as follows:
The criteria for matching deposits clearing the bank, using the Deposit Slip method, are as follows:
In the example below, this deposit would not clear based on the Transaction method, but would have a better chance to clear based on the Deposit Slip method. So, it may be beneficial to Reconcile using one method and then change the method, and Reconcile again using the other method for matching deposits.
Manually Reconcile transactions that were not automatically matched
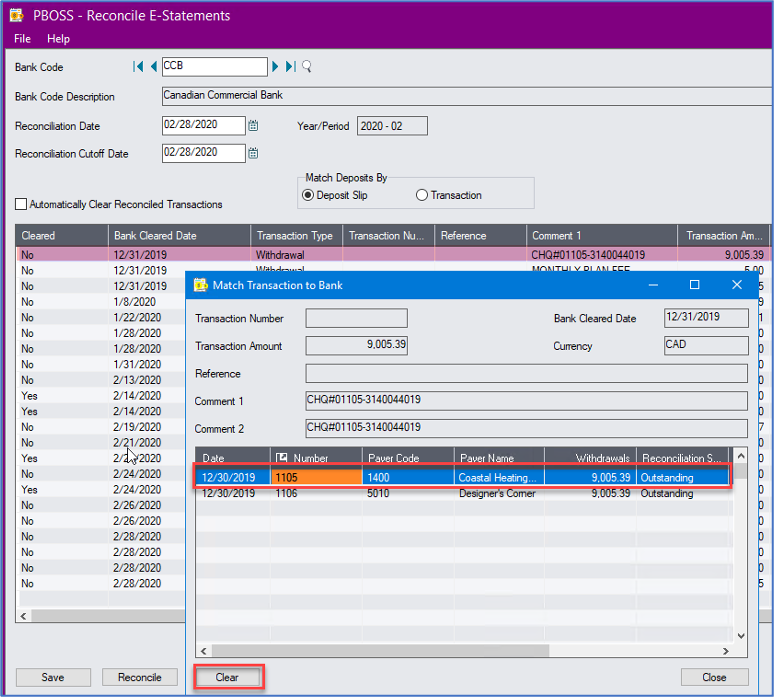
In order to manually match transactions that have not been automatically matched, double click on the line item to display a popup window with a list of transactions that may be eligible for matching. Highlight the correct one and then click Clear. A confirmation box will appear asking if you are sure you want to clear the transaction. If you are, click on Yes. A confirmation is displayed and then the Cleared column on the reconcile screen will then switch from No to Yes.
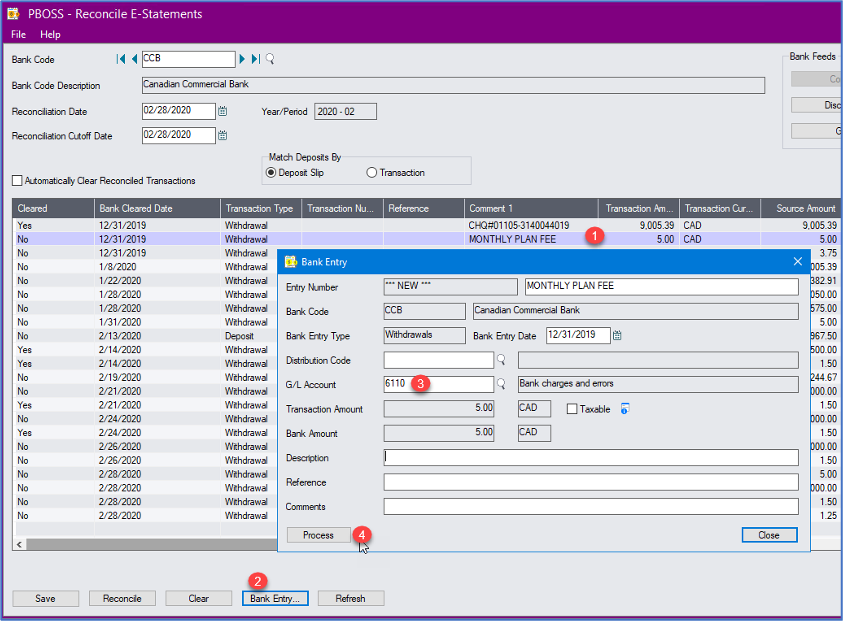
Create bank entries for remaining bank charges or deposits
Once the Reconcile function has been completed, and all other bank deposits and withdrawals manually reconciled, we should be left with the bank transactions for which there are no matching Sage documents. These are usually bank fees, interest, or other pre-authorized payments. We can create the bank entry and match it to the bank transaction all at once.
Highlight the bank transaction and click on Bank Entry. A bank entry popup window appears with the entry description filled in from the bank comment field and the transaction amount also populated. All you need to do is assign a GL account or Distribution Code and fill in the additional fields Description, Reference, and Comments if desired. Then click Process. A confirmation box will appear asking if you are sure you want to add this transaction. When you click ‘Yes’ the bank entry posts and the standard Message appears with the Posting sequence number. The transaction on the reconcile E-Statements screen is then cleared.
Post reconciliation
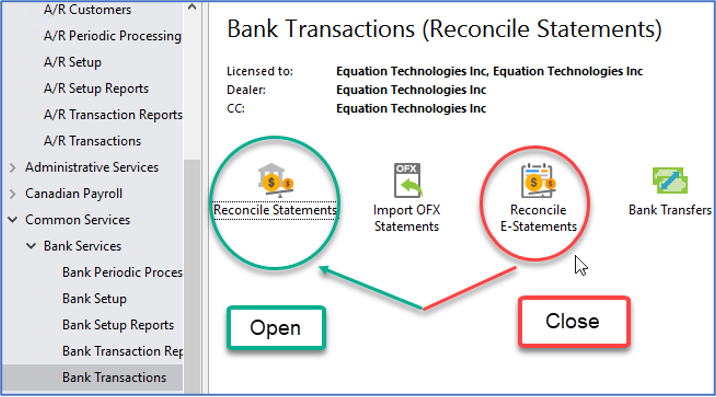
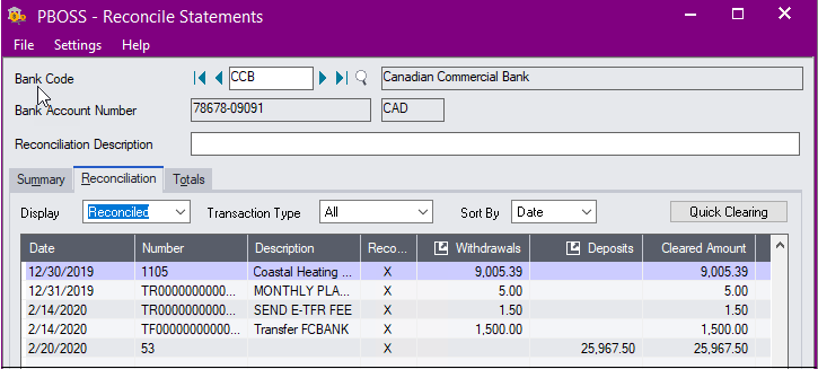
The final step, after auto reconciling, manually reconciling, and creating bank entries, is to Save your work in the Reconcile E-Statements screen. Close that screen, and open the ‘normal’ Reconcile Statements screen. Enter your bank information on the summary page and view the Reconciliation tab to see all the transactions that have been cleared already. Make any necessary adjustments and Post the reconciliation. You’re all done!
Some Tips
A couple of notes on things to watch out for:
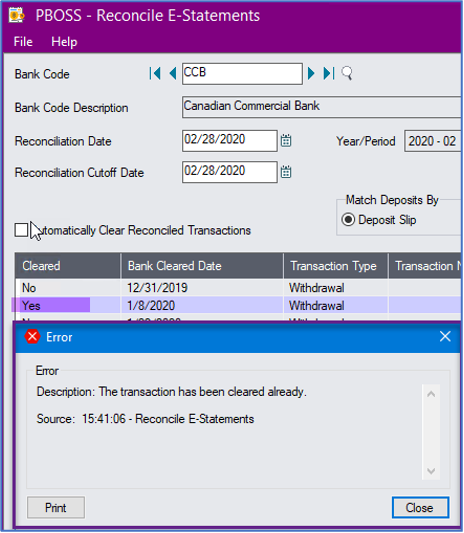
You will need to go to the ‘normal’ Reconcile Statements screen and change it there from Cleared to Outstanding on the Reconciliation tab.

That’s the basic overview of Bank Feeds and how they work with Sage 300. It’s a great time-saver and simplifies the entire bank reconciliation process. If you are need assistance from one of our Sage 300 technical experts or are interested in learning more about Equation Technologies, please contact us or call 866-436-3530. We would be happy to help.